RGV500


I guess I started off the same as everyone else in buying a set of Drysdale engine mounts to fit the RG motor into the VJ22 frame, asking myself why re-invent the wheel? The trouble is, as an engineer I just couldn’t come to terms with mounting the engine rigidly from its cylinder head bolts when those clever chaps back in Japan had originally designed the engine to be resiliently mounted from beneath using a cradle. We also thought there must be a way we could use the standard bolt in the upper rear mount instead of the rather complicated Drysdale arrangement using two separate bolted joints. Nigel at NK Racing agreed, so we set about making a completely new engine mounting arrangement.
Before we started, we agreed on a number of areas that would not be compromised:
1 - The engine should be mounted centrally within the frame, and as far back as possible
2 - The final drive, swinging arm, and rear wheel spindles should be aligned with static sag +30mm
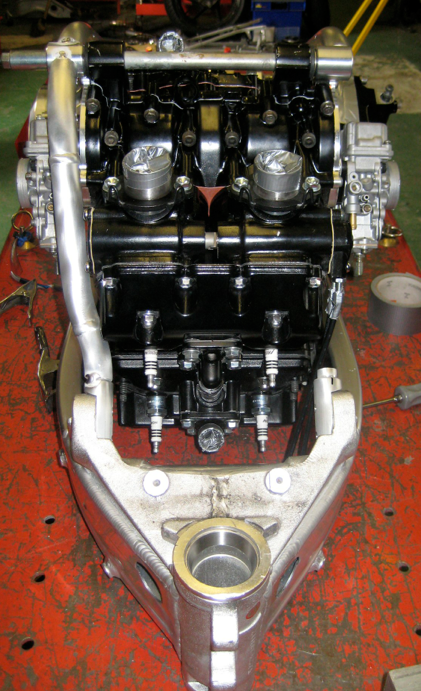
3 - The Carburettor float bowls should be positioned horizontally
Engine Mounts
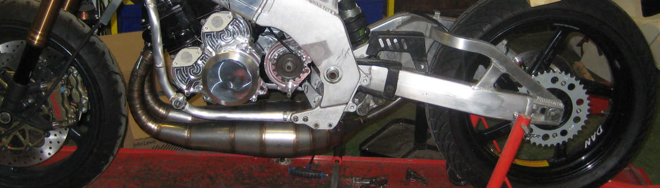

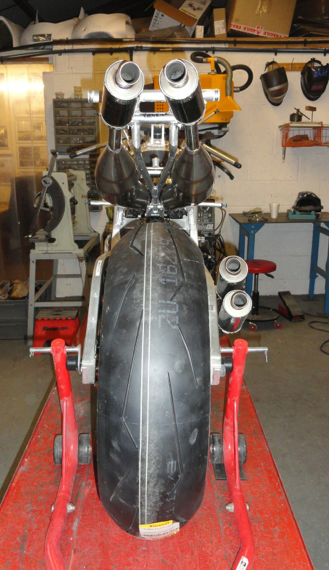
This resulted in the engine sitting a lot higher than many conversions I’ve seen, with the rear cylinders sitting almost entirely between the frame spars. The result of this was to cause problems fitting the carburettors, but made installation of the expansion chambers and fairing lower pretty straightforward.
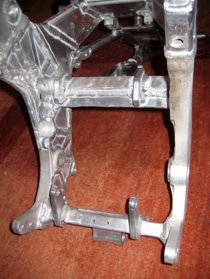
Rear Engine Mounts
The first thing was to remove all the original rear mounts, and remove 10mm of the upper mount crossmember such that we could get the engine as far back as we needed. Nigel then machined a set of new mounts and welded them in position.
You’ll see that the upper mounts are one pice mounts, and utilise the standard engine mounting bolt that is withdrawn through an access hole made in the frame.
Engine Mounting Cradle
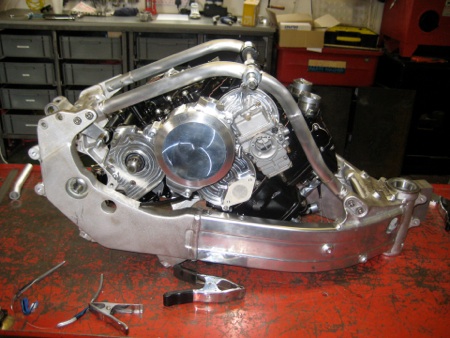
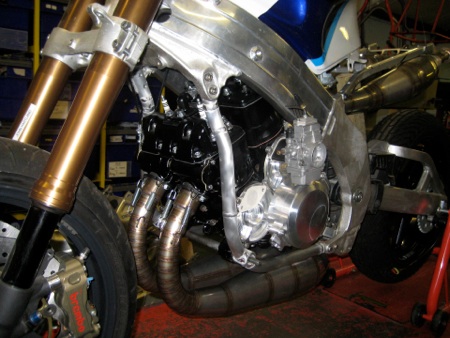
The fabricated mounting cradle uses the standard VJ22 fixing points, and picks up on the RG500 engine’s resilient front mounts. Clearance to the engine was purposely kept very tight so that the finished assembly was as compact as possible, therefore everything has been designed to allow the engine to be removed easily.
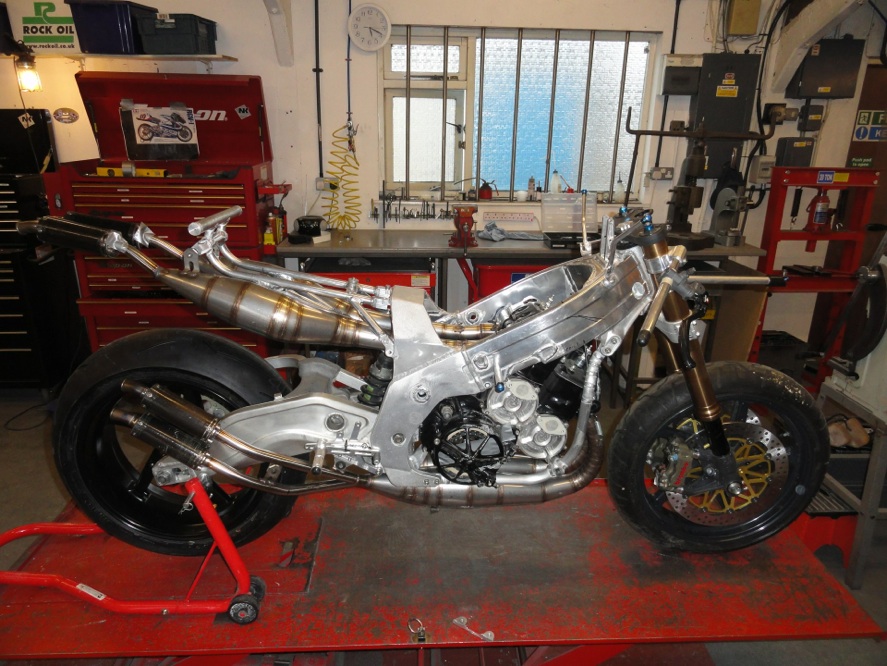
Wheels
The wheels suffered many changes in direction, I started off with the standard VJ22 wheels thinking these would be ok if I were to build the Schwantz Lucky Strike replica, even if they were a bit on the narrow side. To get something a bit meatier in place I tried to find some 3 spoke Dymags but it transpired that they had recently stopped making them in the sizes I was after. Then came the complete change in direction with the overall bike when I decided to go for the XR89 replica, which brought the 5 spoke Brembo wheels off the Aprilia RS250 into play, giving me the ability to move up to a 3.5” front and 4.5” rear which meant that I could fit some reasonably modern tyres. This combination looked good until we fitted the pipes and seat unit... see the picture on the left!

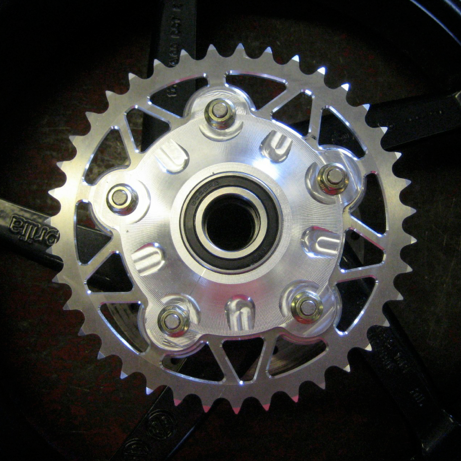
Whilst the front wheel was perfect, as soon as the exhausts and seat were fitted it became obvious that the rear wheel looked far too narrow. I managed to find a new 6” rear wheel from an Aprilia RSV1000 on ebay and headed off to NK Racing to see if Nigel could squeeze it into the VJ23 swinging arm.
Luckily the construction of the RSV wheel leant itself to our plan, in that it has a bolt-on cush drive assembly which was promptly discarded to make way for another of Nigel’s billet creations. The new cush drive assembly uses the thinner cush drive rubbers from a Marchesini wheel and allows the sprocket to be mounted such that we had enough clearance for the chain to run between a 180 section rear tyre, the swinging arm, and the frame sections (which have been modified to give slightly more clearance).

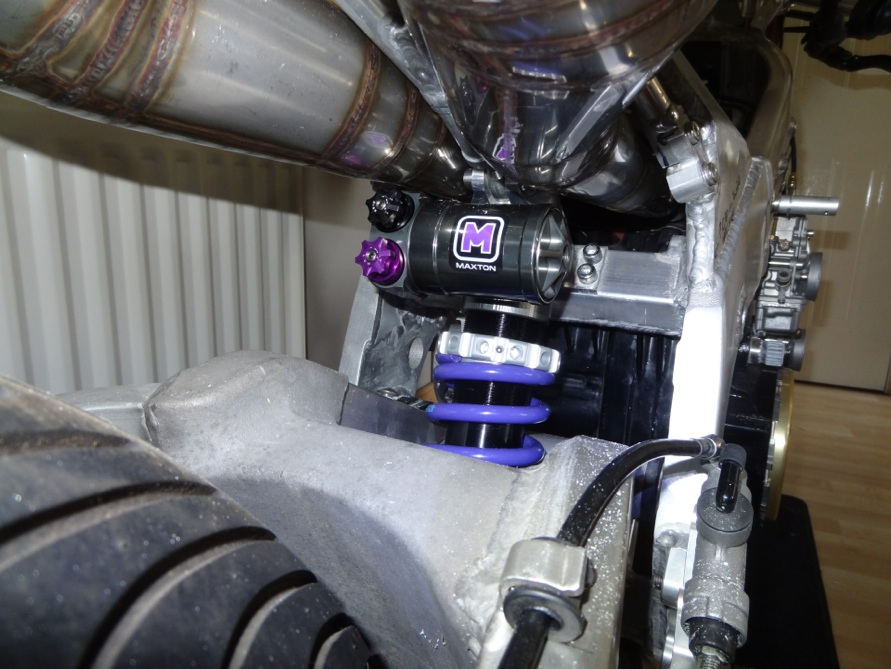
Latest addition is the Maxton GP10 rear suspension unit, which fits beautifully!

